Setting up webhooks
Webhooks send an HTTP POST request to your server whenever something happens on your account — like a message being delivered or a recipient replying. This lets your application react in real time without polling the API.
The two webhook types
Mobile Message supports two types of webhooks:
Inbound messages — fires when someone replies to your dedicated or shared number, or when someone unsubscribes. Inbound webhooks are one of the things an automation can do, so you can also set them up per keyword or per number. See Inbound automations.
Message status updates (delivery receipts) — fires when a message status changes, such as when it's delivered, sent, or fails.
Configuring webhook URLs
- Go to Settings > API
- Scroll down to Webhook URLs
- Enter your endpoint URL for each webhook type
- Click Save Webhook URLs
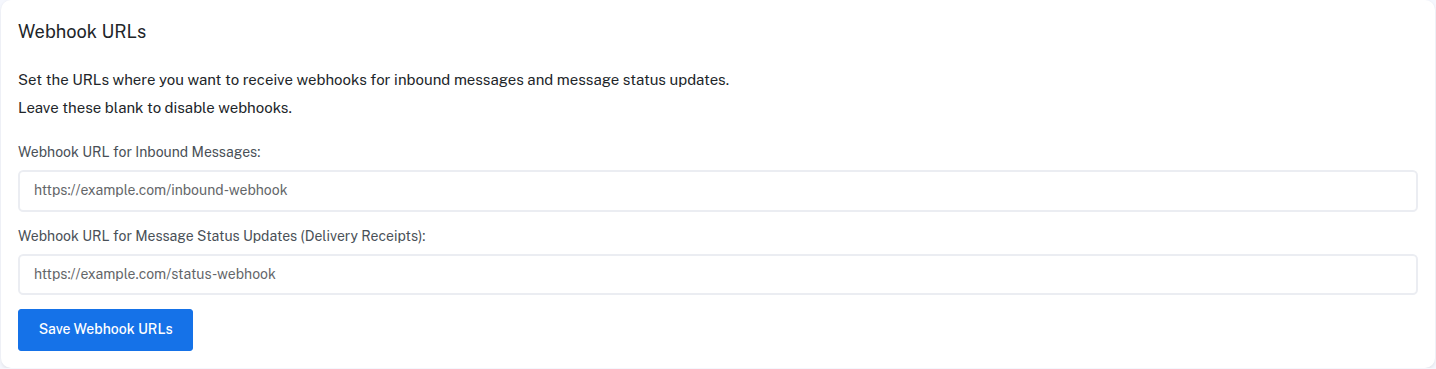
Leave a field blank to disable that webhook type. Your endpoint must use HTTPS and be publicly reachable. URLs that point to localhost, a private network, or another internal address are rejected, whether set here or via the API.
Inbound webhooks and automations
The Inbound Messages field above is a shortcut to an automation. Saving a URL there creates a rule that posts every inbound message to it, and clearing the field removes the rule. The rule appears on the Automations page with an API webhook badge, and editing it in either place keeps the other in step. Subscribing to inbound messages through the API or through Zapier sets the same rule.
The payload has not changed, so anything already receiving these posts keeps working exactly as it did.
What you get on top of the single URL is choice about which messages go where. On the Automations page you can post only messages containing a keyword, post messages that arrive on one dedicated number to one endpoint and another number to a different endpoint, and combine a webhook with an auto reply, an email, a contact list or a forward to another mobile. See Inbound automations for the full set.
One thing worth knowing if you use the API field. It reads the account-wide rule, so it only reflects a rule that posts every inbound message to a single URL. If you edit that rule into something narrower, such as adding a keyword or restricting it to one number, the rule keeps running and keeps posting, but the API field and the Zapier subscription read as empty. Saving a URL there again creates a fresh account-wide rule and leaves your edited rule alone.
Inbound message webhook payload
When someone replies to your number, you'll receive a POST request with this JSON body:
{
  "to": "61400000010",
  "sender": "61412345678",
  "message": "Yes, I'd like to confirm my appointment",
  "received_at": "2026-03-08 14:35:00",
  "type": "inbound",
  "original_message_id": "abcd1234-efgh-5678-ijkl-9876543210mn",
  "original_custom_ref": "tracking001"
}
Field Description
to The dedicated number the reply was sent to
sender The phone number of the person who replied
message The reply text
received_at UTC timestamp when the reply was received
type Either inbound (a reply) or unsubscribe (the recipient opted out)
original_message_id The message_id of the outbound message they're replying to (empty if unknown)
original_custom_ref Your custom_ref from the original message (empty if not provided)
Matching a reply to the message it answers
original_message_id is the same value that came back as message_id in the send response, so matching on it works. It only works, though, if you store those IDs the way the API hands them out.
Every recipient gets its own message_id. A send request with ten recipients returns ten results, each with a different message_id, even when the message text is identical and they all belong to the same job, order or campaign on your side. Store each message_id against the recipient it was returned for. If you keep a single ID per job, later recipients overwrite earlier ones and their replies stop matching.
We match a reply on the two phone numbers involved. A reply is linked to the most recent message sent to that mobile number from the number they replied to. Send the same person several messages from the same number and their reply matches the latest one. When there's no matching outbound message, original_message_id and original_custom_ref both arrive empty.
Use custom_ref if you'd rather match on your own identifier. Set it when you send and it comes back on the reply as original_custom_ref. You control the value, so you can set it to your own job or order number and group every recipient of that job under it. You can also look those messages up later with GET /v1/messages?custom_ref=YOUR_REF, which returns each recipient along with its message_id.
Status update webhook payload
When a message status changes, you'll receive a POST request with this JSON body:
{
  "to": "61412345678",
  "sender": "MyBrand",
  "message": "Your appointment is confirmed for tomorrow at 3pm",
  "custom_ref": "tracking001",
  "status": "delivered",
  "message_id": "abcd1234-efgh-5678-ijkl-9876543210mn",
  "received_at": "2026-03-08 14:35:00",
  "part_number": 1,
  "total_parts": 1
}
Field Description
to The recipient's phone number
sender The sender ID used
message The original message text
custom_ref Your custom reference (if provided)
status The new status: sent, delivered, or failed
message_id The UUID assigned when the message was sent
received_at UTC timestamp of the status update
part_number Which part of the message this status is for
total_parts Total SMS parts for this message
For multi-part messages (messages longer than 160 characters), you'll receive one webhook per part with different part_number values.
Testing webhooks
Before connecting your real server, use a free tool like webhook.site to inspect the raw payloads. Paste the webhook.site URL into your webhook settings, send a test message, and you'll see exactly what data arrives.
Retry behaviour
If your server returns an error or doesn't respond, Mobile Message will retry the webhook with exponential backoff — starting at 60 seconds and increasing up to 1 hour between attempts, for up to 10 retries.
What to expect for large campaigns
Status webhooks are sent as individual POST requests, one per SMS part. A campaign of 40,000 single-part messages will generate up to 40,000 status events, and more if your message is longer than 160 characters (one event per part, per status change).
A few things to plan for:
- Events arrive in bursts. Webhooks are queued and delivered in parallel, so expect a high rate shortly after a large send. Return a
200quickly and do any heavy processing asynchronously. - The tail can take a while. Delivery statuses depend on receipts from the mobile networks. Most arrive within minutes, but it's normal for a portion to keep arriving over the following hours, and some stragglers can arrive days after the send. This is normal carrier behaviour, not a fault.
received_atis the event time. It records the UTC time of the status update itself, not the time the webhook reached your endpoint, so late or retried webhooks still carry the original event time.- Check the delivery log. Settings > API > View Webhook Delivery Logs shows each webhook attempt, its response code, and retry state. It's the quickest way to confirm whether events were sent and received.
Security tips
- Always use HTTPS for your webhook URLs
- Validate the incoming request by checking the payload format matches what you expect
- Return a
200status code quickly to acknowledge receipt — do any heavy processing asynchronously
Anyone who discovers your webhook URL can post to it, so if you want proof that a request genuinely came from us, you can turn on signing. Generate a signing secret under Settings > API and every webhook we send will include a signature your server can check before it acts on the payload. It's optional and nothing changes until you generate a secret. See Verifying webhook signatures.
For more on the API, see Getting started with the API and the full API documentation. For inbound messages, see Inbound automations, and for phone systems see the 3CX SMS Integration Guide.