Using contact lists
Contact lists let you organise your contacts into groups — for example, "VIP Clients", "Monday Appointments", or "Newsletter Subscribers". Lists make it easy to send a message to a specific group without manually selecting contacts each time.
Creating a list
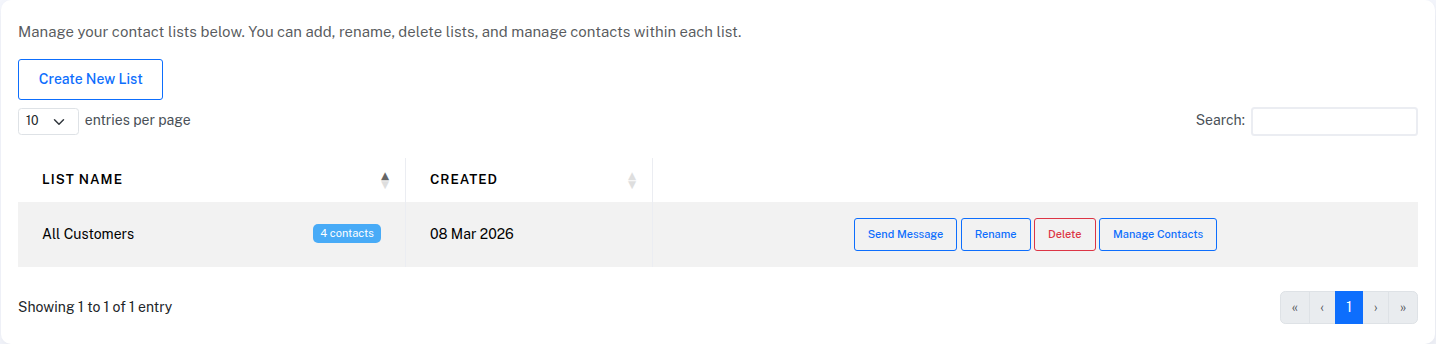
- Go to Contacts > My Lists
- Click Create New List
- Enter a name for the list and click Save List
Your new list will appear in the table immediately. You can create as many lists as you need.
Adding contacts to a list
There are several ways to add contacts to a list:
From the Lists page — click Manage Contacts on any list, then click Add Contacts to search and select existing contacts.
From the Contacts page — select one or more contacts using the checkboxes, then use the Add to List dropdown that appears to add them to a list.
During import — when importing contacts from a spreadsheet, you can choose which list to add them to as part of the import process.
When adding a single contact — the Add Contact form on the Contacts page includes an Add to list(s) field where you can select one or more lists.
Viewing and removing contacts in a list
Click Manage Contacts on any list to see all the contacts it contains. Each contact shows their name, phone number, and company.
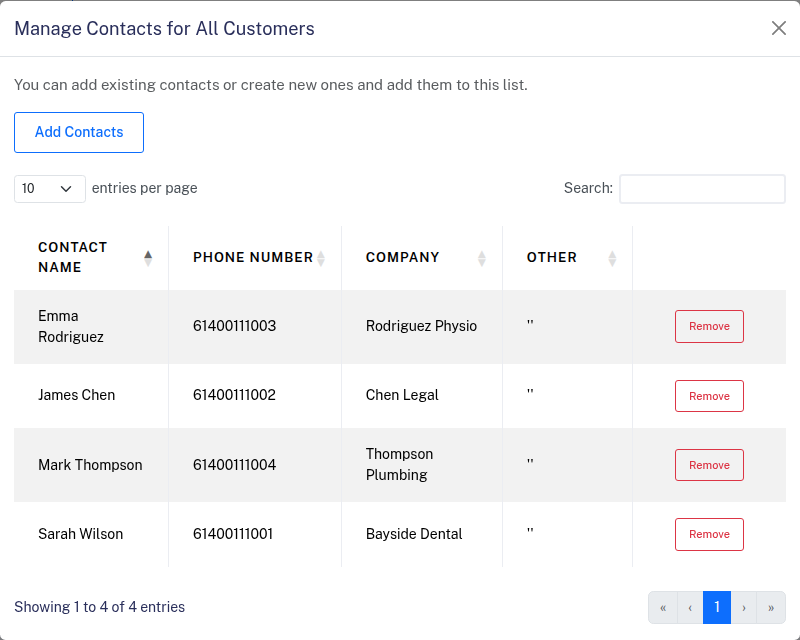
To remove a contact from the list, click Remove next to their name. This only removes them from the list — the contact itself is not deleted from your account.
To remove several at once, tick the checkbox next to each contact (or the checkbox in the table header to select everyone on the page), then click Remove Selected. As with the single Remove, this only takes them off the list — the contacts stay in your account and in any other lists they belong to.
Renaming a list
Click Rename next to the list you want to update, enter the new name, and save. The list keeps all its existing contacts.
Deleting a list
Click Delete next to the list you want to remove. Deleting a list does not delete the contacts in it — they remain in your account and in any other lists they belong to.
Sending a message to a list
You can send a message directly to a list from the Lists page by clicking Send Message, or by selecting a list on the Send Messages page. Anyone on your unsubscribe list is automatically filtered out before the message is sent.